How to knit a woolen sock
Keep wearing your favorite socks for a long time to come!
Our wool socks are quite durable, but nothing lasts forever. Typically, wool socks wear out first at the toe, where a small hole gradually expands. But don’t worry, mending a hole in a wool sock is quite easy!
Many of us may throw away broken wool socks and buy new ones right away – but repairing wool socks is also an ecologically sustainable option. Producing new clothes requires natural resources and energy, while repairing old clothes reduces this need.
In addition, darning wool socks preserves tradition. It is a skill that has been passed down from grandmothers to mothers and on to children. Darning is both fun and rewarding!
On this page, you will find clear, step-by-step instructions for darning wool socks. The instructions are available in video and text format.
To mend woolen socks, you will need:
In addition, a dribbling ball or small ball makes dribbling significantly easier. In the example images, we use a small juggling ball, but you can also use an actual dribbling ball or even a small stuffed toy.
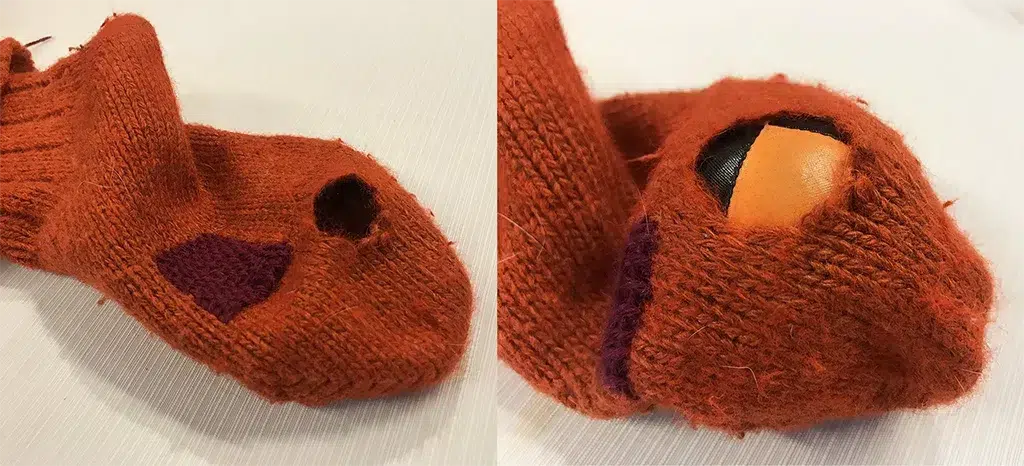
1. Clean the area around the hole
If there are loose threads in the area to be darning, first trim the area and the hole with scissors. This will make darning easier and clearer. Place the darning needle/ball inside the woolen sock so that the area to be darning is easy to handle.
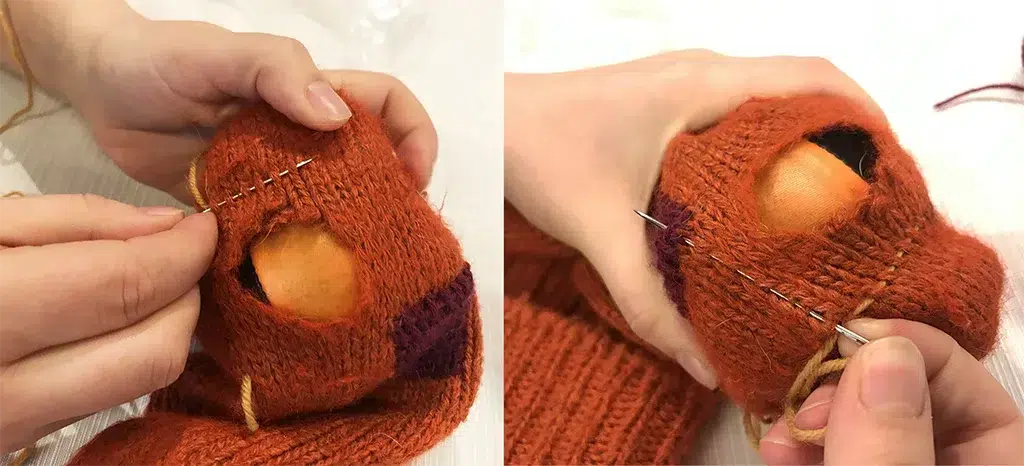
2. Limit the hole area
Use small front points to mark a square around the hole. The size of the square will also determine the size of the final location.
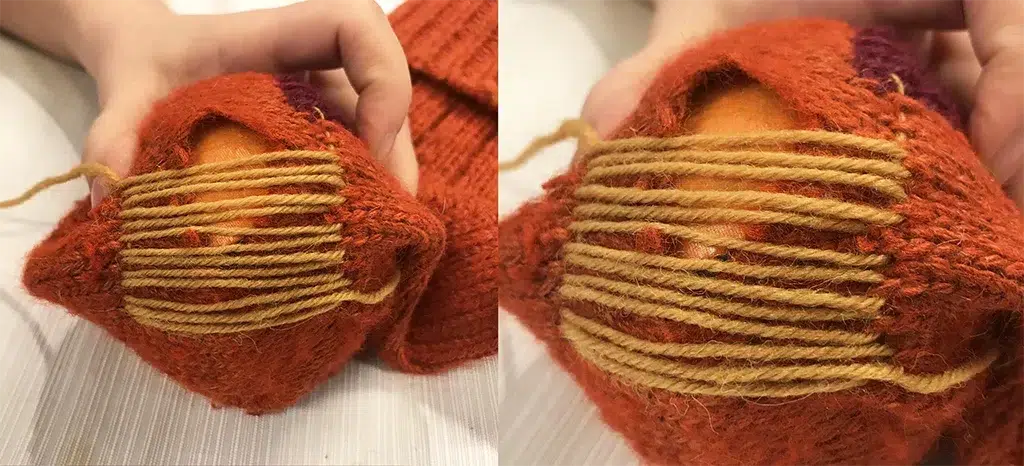
3. Weave the warp threads
Weave the warp threads along the edges of the square, following the direction of the loop chains. There should be two warp threads for each loop chain.
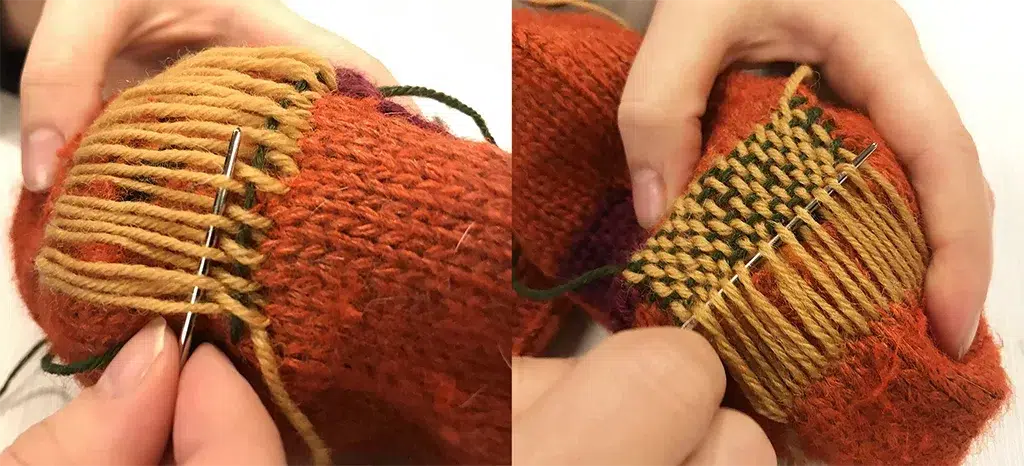
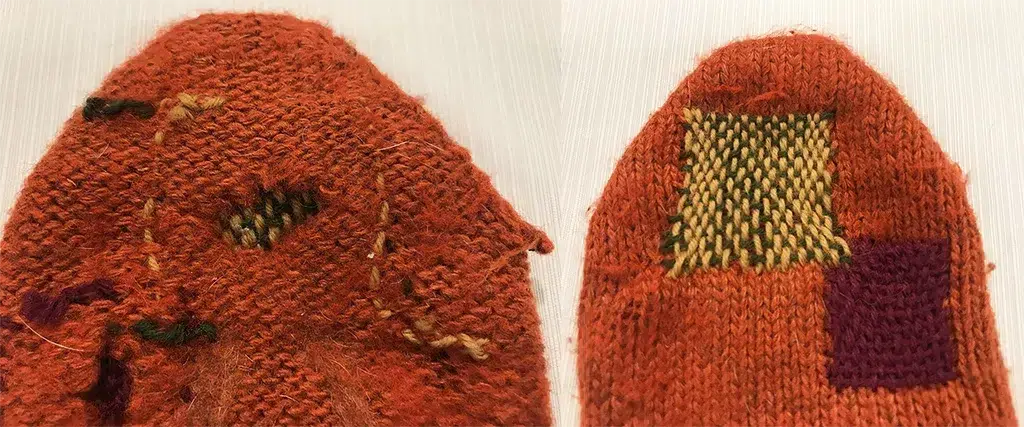
4. Darn grid
Weave the thread alternately over and under the warp threads. At the end of the row, weave the thread through the loop and continue to the next row. This will gradually form a neat grid at the joining point. While weaving, you can tighten the grid structure by pressing it with a needle. (In the example picture, we use a different colored thread to illustrate the grid.)
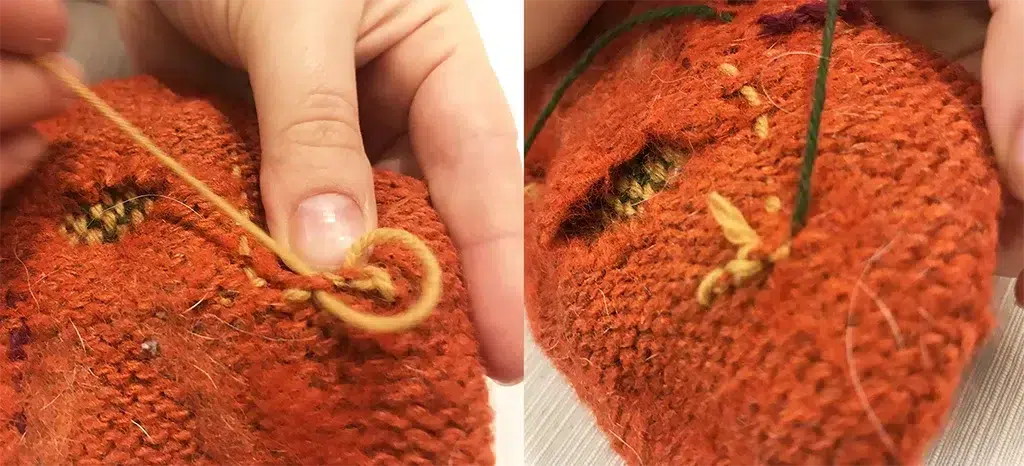
5. Conclude the darning
Once the grid is complete, all that remains is to weave in the ends! Use a needle to pull all the remaining yarn ends into the wool sock and weave them lightly into the wrong side of the sock.